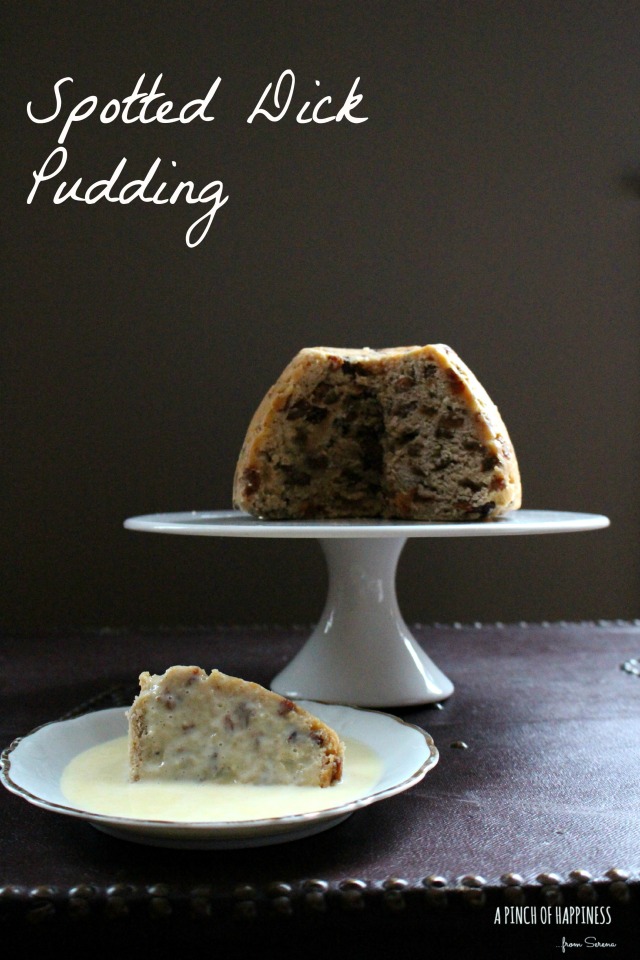
Spotted Dick …NOT what you think! ;)

[scorrete in basso per la versione in italiano]

I remember blushing when I ordered this at the restaurant. It was more like a whisper, really.

But then I read a little about it and discovered that “dick” was the word commonly used in the past for “pudding”. No one knows exactly why: some say it comes from the abbreviation of the word “pudding”, some that comes from “dough”. Anyway, all I know is that you definitely remember the first time you order it! 🙂

Apparently the history of puddings in England has had highs and lows until they went totally out of fashion at some point. During the 19th century though they had a huge revival thanks to Prince Albert, the consort of Queen Victoria, due to the fact that Victoria had a sweet tooth and puddings were her favourite thing. I have always loved Queen Victoria, and now I like her even more!

Back to spotted dick, this recipe made its first published appearance in Alexis Soyer’s The modern Housewife or ménagère, published in 1849 where it was described as a suet pastry rolled out and sprinkled with raisins. Nowadays it should be cooked in a special tin to get its traditional cylindrical shape, but the tin is impossible to find, so it is more commonly cooked in a regular pudding bowl. It is generally served hot with custard.

I really loved this recipe, it is yummy and super easy to make!

spotted dick pudding

Ingredients for one 1.2 l. pudding bowl

  • 225 g self raising flour or regular flour with 1 tsp baking powder
  • 110 g shredded regular or vegetable suet
  • 75 g golden cane sugar
  • 225 g sultanas soaked in brandy
  • a pinch of salt
  • 150 g cold water

Sieve together the flour, the baking powder if you have it and the salt. Add the suet, the sugar and the fruit previously squeezed. Add the cold water (adding a drop more if you need it) to get a firm dough.

Place the dough in a greased pudding bowl, cover with foil following THIS method and steam for 2 hours.

Serve hot with custard and enjoy!

Ricordo di essermi vergognata quando ho ordinato questo dolce al ristorante, per via del nome abbastanza singolare. Infatti più che altro l’ho sussurrato.

Ma poi ho letto un po’ di storia e ho scoperto che “dick” era in passato la parola comunemente usata per definire “pudding”. Non si sa esattamente il perché, alcuni sostengono che derivi dalla parola “dough”, altri che sia un’abbreviazione del termine “pudding” stesso. In ogni caso, quello che è certo è che vi ricorderete sicuramente della prima volta in cui lo ordinerete al ristorante! 🙂

A quanto pare la storia dei pudding in Gran Bretagna ha avuto alti e bassi, fino a che questi dolci così ricchi andarono fuori moda. Durante il diciannovesimo secolo ebbero un revival grazie al Principe Alberto, consorte della Regina Vittoria, che li riportò in auge a quanto pare a causa del fatto che Vittoria aveva un debole per i dolci e i pudding erano i suoi piatti preferiti.

A me Vittoria è sempre stata particolarmente simpatica e ora che ho scoperto questo suo amore per i dolci mi piace ancora di più!

Tornando allo Spotted Dick, questa ricetta ha fatto la sua prima apparizione su carta stampata nel libro di Alexis Soyer’s The modern Housewife or ménagère, pubblicato nel 1849 dove viene descritto come una pasta di suet stesa e cosparsa di uvette. Al giorno d’oggi viene cotto in speciali forme che gli danno la caratteristica forma cilindrica. Ma dato che questi stampi sono impossibili da trovare la maggior parte delle volte si finisce a cuocerlo in una normale ciotola da pudding. Generalmente viene servito caldo con crema inglese.

Questa ricetta mi è piaciuta tantissimo e oltretutto è facilissima da realizzare! Se non avete il suet potete provare a sostituirlo con shortening vegetale non idrogenato (avete presente quello bianco, tipo Crisco?) oppure con margarina. Potete anche utilizzare lo strutto, che è il grasso che di più si avvicina al suet oppure addirittura il burro, anche se non vi consiglio di usare solo burro per via del fatto che il dolce in se non deve avere un gusto burroso. Vi consiglio di comprare su internet dei pacchetti di suet, che viene già secco e tritato, è fantastico anche per preparare paste friabili….ma questa è un’altra storia! Lo trovate anche in versione vegetale se l’idea di fare dolci con grasso di manzo non fa per voi.

Ingredienti per una ciotola da 1.2 l.

  • 225 g farina auto lievitante oppure farina 00 e un cucchiaino di baking powder
  • 110 g suet o materia grassa scelta da voi per sostituire
  • 75 g zucchero di canna chiaro
  • 225 g uvetta sultanina ammollata in brandy
  • un pizzico di sale
  • 150 g acqua fredda

Setacciate la farina, il bakig powder se lo usate e il sale, in una ciotola. Aggiungete il suet, lo zucchero e l’uvetta strizzata. Aggiungete poi l’acqua (anche qualche grammo in più se serve) per realizzare un impasto molto sodo.

Ponete l’impasto nella ciotola da pudding imburrata, coprite con carta stagnola seguendo QUESTO metodo e cuocete al vapore per 2 ore.

Servite caldo con crema inglese e magari una bella tazza di tè al latte per un dessert very british! 🙂

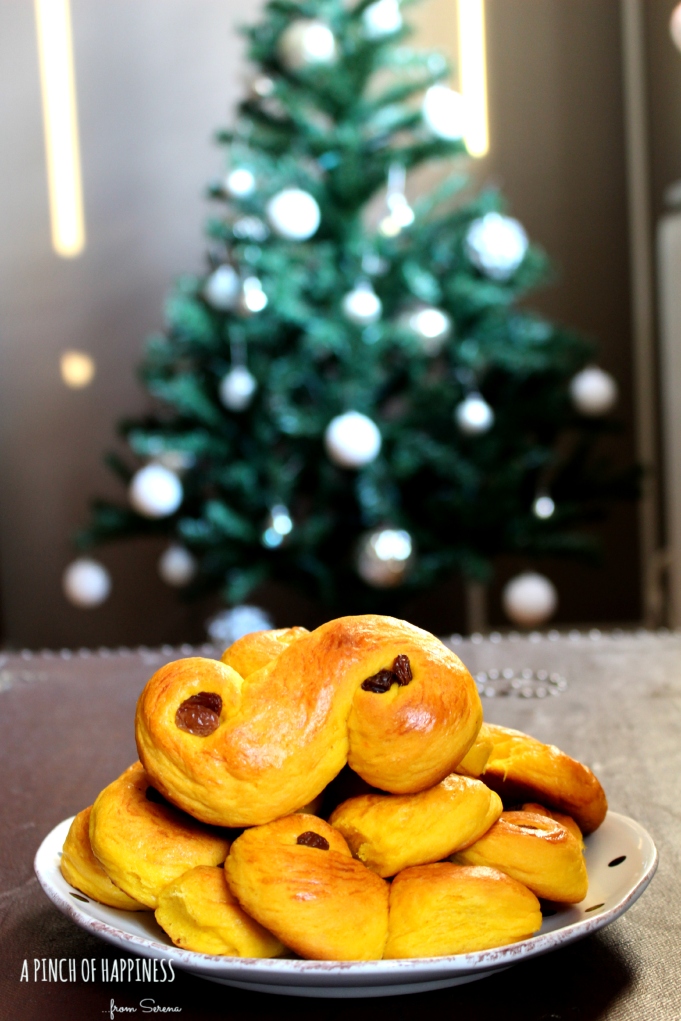
Lussekatter – flavours of Christmas in Sweden

“Now ‘neath the silver moon Ocean is glowing,
O’er the calm billows, soft winds are blowing.
Here balmy breezes blow, pure joys invite us,
And as we gently row, all things delight us.
Hark, how the sailor’s cry joyously echoes nigh:
Santa Lucia, Santa Lucia!
Home of fair Poesy, realm of pure harmony,
Santa Lucia, Santa Lucia!” 

[scorrete in basso per la versione in italiano]

lussekatter

I never liked Christmas. I was like the grinch in a sea of Santas. But here in Sweden the atmosphere is really magic and eventually quite contagious….I’ve been living here for 1 year only and I’m totally in love with all things Christmas now! 🙂

Before Christmas comes St. Lucy on the 13rd December and the celebrations for this day are very popular. The traditions are various, but I go directly to the one I love the most: FOOD. You can find lussekatter everywhere here, but the homemade ones are way better. So here is a great recipe for you all, enjoy a little bit of the Swedish Christmas anywhere you are!

lussekatter

Lussekatter {sweet saffron buns}
From Call me cupcake 

makes about 30 small buns.

  • 12 g. dehydrated yeast (or 50 g. fresh)
  • 1 g. saffron
  • 800 g. flour
  • 200 g. butter
  • 300 g. milk
  • 180 g. sugar
  • 3 g. salt
  • 1 egg
  • 200 gr. cream
  • a handful of raisins (I soaked them in Tio Pepe wine)
  • the zest of 1/2 orange, finely grated (this is unconventional, but I really think it works perfectly in the recipe!)

one egg and a dash of cream or milk to brush.

Start by soaking the raisins, if you want to. Melt the butter with the saffron, then add the milk and cream and check the temperature, you need it at about 30 °C. If you don’t have a thermometer, just wait until it’s room temperature. Sprinkle the yeast in a big bowl and add the milk+butter mix. Add the sugar, the egg and part of the flour. Mix and then add the salt. Add the rest of the flour and knead. You will see that the dough it’s really moist and fat, so I find it easier to knead it directly in the bowl, to avoid adding too much flour. Leave to proof until doubled in size covered with loose cling film.

Then pour it on a surface dusted with flour and knead really quickly, don’t over-knead it or it will get elastic and you will need to leave it to rest again before you can shape it. Make little S shaped buns and leave them to proof again on a tray lined with baking paper, remembering to leave some space between a bun and the other, as they will grow!

Once they are puffy (about 30-45 mins) decorate them with 2 raisins, brush them with the egg and cream and bake them in the middle of the oven at 220 °C for about 10 minutes or until golden underneath.

Remember to freeze immediately the ones you don’t want to eat as they dry out very quickly. I recommend you try them with a cup of hot chocolate, for me is the best combination!

TIP: you can use this dough to make an edible gift like this.

I wish you all a lovely Christmas!

lussekatter

“Sul mare luccica l’astro d’argento.
Placida è l’onda, prospero è il vento.
Venite all’agile barchetta mia,
Santa Lucia! Santa Lucia!
Con questo zeffiro, così soave,
Oh, com’è bello star sulla nave!
Su passegieri, venite via!
Santa Lucia! Santa Lucia!
In fra le tende, bandir la cena
In una sera così serena,
Chi non dimanda, chi non desia.
Santa Lucia! Santa Lucia!
Mare sì placida, vento sì caro,
Scordar fa i triboli al marinaro,
E va gridando con allegria,
Santa Lucia! Santa Lucia!”

lussekatter

Devo ammettere che il Natale non mi è mai piaciuto. Ma qui in Svezia l’atmosfera è davvero magica e a questo punto direi anche contagiosa, visto che vivo qui da poco più di anno e già ho cambiato idea, adoro tutto ciò che è natalizio! 🙂

Prima di Natale però c’è la festa di Santa Lucia, il 13 dicembre e le celebrazioni per questa festa qui sono davvero popolari. Le tradizioni sono tante ma io passo direttamente a quella che mi interessa di più: IL CIBO. In questi giorni si vedono Lussekatter ovunque, ma quelli fatti a casa sono tutta un’altra cosa. Così eccovene una ricetta fantastica, perché possiate assaporare un po’ del Natale svedese ovunque voi siate!

lussekatter

Lussekatter {panini dolci allo zafferano}
da Call me cupcake 

ricetta per circa 30 panini di dimensione medio-piccola

  • 12 g. lievito di birra disidratato (oppure 50 g. di lievito di birra fresco)
  • 1 g. zafferano
  • 800 g. farina
  • 200 g. burro
  • 300 g. latte
  • 180 g. zucchero
  • 3 g. sale
  • 1 uovo
  • 200 gr. panna
  • una manciata di uva passa (la mia ammollata in Tio Pepe)
  • la scorza di mezza arancia grattugiata finemente (la ricetta originale non la prevede, ma secondo me ci sta benissimo!)

un uovo e un goccio di panna o latte per dorare.

Cominciate mettendo a bagno l’uvetta, se avete deciso di farlo. Fondete il burro con lo zafferano e poi aggiungete il latte e la panna. Controllate la temperatura: dovrete utilizzarlo a 30° C circa. Se non avete un termometro aspettate ed utilizzate il composto a temperatura ambiente. Disponete il lievito in una ciotola capiente e versatevi il composto di latte e burro. Aggiungete o zucchero, l’uovo e un poco di farina e mescolate. Aggiungete il sale e la restnte farina e lavorate fino ad ottenere un impasto liscio. Noterete che l’impasto è molto umido e grasso, quindi io ho l’abitudine di lavorarlo direttamente nella ciotola per evitare di dover aggiungere troppa farina. Copritelo con della pellicola a contatto con la superficie della pasta e lasciatelo lievitare fino al radoppio della dimensione. A questo punto rovesciatelo su una superficie infarinata e lavoratelo velocemente, evitate di lavorarlo in eccesso o la pasta diventerà elastica e sarà necessario farla riposare di nuovo prima di poter formare i panini. Formate dei panini a forma di S e disponeteli su una placca coperta di carta da forno, ben distanziati l’uno dall’altro. Una volta lievitati (ci vorranno all’incirca 30-40 minuti), spennellateli con l’uovo mescolato alla panna e decorateli con 2 uvette per panino.

Informate a 220°C per circa 10 minuti o comunque fino a che siano ben dorati alla base.

Ricordatevi di congelare immediatamente quelli che non vorrete consumare subito dato che si seccano velocemente. Io vi consiglio di provarli con una tazza di cioccolata calda, per me è la combinazione perfetta!

PS: potete utilizzare questa ricetta per realizzare dei regalini come questo

Vi auguro un fantastico Natale!

Cocoa and marzipan cake with whole pears

[scorrete in basso per la versione in italiano]

“..but I’m still touched by falling leaves
especially those falling on boulevards
especially chestnut leaves
and if kids are around
if it’s sunny
and I’ve got good news for friendship
especially if my heart doesn’t ache
and I believe my love loves me
especially if it’s a day I feel good about people
I’m touched by falling leaves
especially those falling on boulevards
especially chestnut leaves.”

Nazim Hikmet

You gotta love winter.

Especially if you decided to move to Sweden.

Me, I don’t like it, but I have started to appreciate the beauty of it, only since I moved here. Autumn goes so fast, I’m not even sure it is winter already….it is cold, but it is full of yellow, red and orange leaves everywhere and that is magical. Soon, they will be gone and everything will turn white. So I wanted to create a cake that could try to represent this very short period of the year, I hope you get the feeling.

So let’s say: winter is ok, with cake and hot chocolate. Deal?!

Some time ago I found a recipe for a cocoa and marzipan cake on Technicolor kitchen and I have decided to use it to make this cake. I have slightly adapted it and I am very pleased with the result!

torta con pere intere

For the poached pears:

  • 3 medium size pears, I used conference because they are delicious for baking
  • water to cover them, I used 1 liter
  • 25% sugar, I used 250 g.
  • you can add spices or flavours, like citrus peel, I didn’t because I figured out there was enough different flavours! 🙂

Start by taking the core out with the specific tool (the round one, the same that you use to make melon pearls!) from the bottom of the pears. What you want is to change their shape as little as possible. Now peel them and then bring them to boil and cook for about 10 minutes. Tip: boil the water in the kettle first, it will go much faster and it will be easier to avoid overcooking the pears!

For 1 loaf cake:

  • 200 g.  almond paste
  • 200 g. sugar (reduce the quantity, if using marzipan instead than almond paste, as it is sweeter)
  • 220 g. butter
  • 220 g. eggs
  • 4 g. salt
  • 210 g. all purpose flour
  • 45 g. bitter cocoa powder
  • 5 g. baking powder
  • vanilla powder (from the beans, not the chemical white powder! )
  • 120 g. milk
  • sliced almonds, to decorate
  • icing sugar, to decorate

cocoa cake with whole pears

Start with all the ingredients at room temperature.

Prepare the tin by greasing it with butter and dusting it with flour, then turn on the oven and 180 °C.

In a food processor or in a blender combine sugar and almond paste, mix until there are no big pieces of almond paste left. Then mix to the butter and salt and whip with a whisk until nice and airy (if you used the food processor, you can directly add the butter in, it works. The blender though, doesn’t. If you have a mixer, just use the paddle tool for the whole thing.)

Add the eggs a little bit at the time and keep whisking. Then add the flour, cocoa, baking powder and vanilla and mix just until you have a smooth mix. Do not over mix the flour. Add the milk at the end.

Pour a little bit of cake mix on the bottom of the tin, about 2 cm. thick. Place the pears over the mix, I put them straight in a line but you can put them however you want them. Now, if you have it, add the rest of the cake batter with a piping bag, if you don’t have or don’t know how to use a piping bag, do it with a spoon making sure that you reach everywhere.

Sprinkle the almonds on the top and bake for about 1 and half hours, making sure the cake doesn’t get too dark on the top, if it does, lower the temperature of the oven to 160. Always check with a tooth pick that the cake is dry inside before removing it from the oven, consider that the pears will release their juice, so insert the tooth pick far from the pears 😉

Let it cool completely in the tin and then carefully take it out. If you have troubles with it, just place it for a few seconds in hot water and it will help it to come out!

Now slice it and see…the pears are stuffed with cake! Pretty cool, uh?! 😀

torta con pere interecake with whole pears

Happy baking and happy autumnwinter!

“Veder cadere le foglie mi lacera dentro
soprattutto le foglie dei viali
Soprattutto se sono ippocastani
soprattutto se passano dei bimbi
soprattutto se il cielo è sereno
soprattutto se ho avuto, quel giorno,
una buona notizia
soprattutto se il cuore, quel giorno,
non mi fa male
soprattutto se credo, quel giorno,
che quella che amo mi ami
soprattutto se quel giorno
mi sento d’accordo
con gli uomini e con me stesso.
Veder cadere le foglie mi lacera dentro
soprattutto le foglie dei viali
dei viali d’ippocastani.”

Nazim Hikmet 

Bisogna essere amanti dell’inverno.

Specialmente se ci si è trasferiti in Svezia.

A me non piace, ma ho cominciato ad apprezzarne la bellezza da quando mi sono trasferita qui. L’autunno passa talmente veloce che non ho ancora capito se l’inverno poi, è già cominciato… fa freddo, ma le strade sono ancora piene di foglie gialle, rosse e arancioni e questo è davvero magico. Presto, tutto si tingerà di bianco. Così ho voluto cercare di preparare una torta che rappresentasse al meglio questa corta stagione, spero che ne percepiate l’atmosfera.

Ok, diciamo che l’inverno va bene, con torta e cioccolata calda. Affare fatto?!

Qualche tempo fa ho trovato una ricetta di  Technicolor kitchen per una torta con cacao e marzapane e ho deciso di utilizzarla per questo dolce. L’ho leggermente modificata e sono molto contenta del risultato!

torta con pere intere

Per le pere :

  • 3 pere di media dimensione, io usato le conference perché sono deliziose per i dolci!
  • acqua a coprire, io ne ho usata 1 litro
  • 25% zucchero, io ne ho usati 250 g.
  • potete anche aggiungere spezie o aromi, per esempio la scorza degli agrumi. Io non l’ho fatto perchè questa torta ha già molti sapori diversi!

Cominciate togliendo il torsolo della pera con l’apposito utensile (non so se avete presente quello che si usa anche per fare le perle di melone!) partite dal basso- l’idea è quella di togliere il centro cercando di mantenere la forma il più intatta possibile. Pelate poi le pere e portatele a bollore con l’acqua e lo zucchero. Cuocetele per circa 10 minuti. Consiglio: partite già da acqua bollente, farete molto prima ed eviterete di scuocere le pere!

Per una torta in uno stampo da plum cake:

  • 200 g.  pasta di mandorle
  • 200 g. zucchero (riducete la quantità se usate il marzapane al posto della pasta di mandorle, perché è più dolce)
  • 220 g. burro
  • 220 g. uova
  • 4 g. sale
  • 210 g. farina 00
  • 45 g. cacao amaro
  • 5 g. baking powder
  • polvere di vaniglia (realizzata tritando bacche secche!)
  • 120 g. latte
  • mandorle filettate, per decorare
  • zucchero a velo

torta con pere intere

Cominciate con tutti gli ingredienti a temperatura ambiente.

Preparate lo stampo, imburratelo e infarinateo, eliminado la farina in eccesso. Scaldate il forno a 180 °C.

In un food processor (robot da cucina) o frullatore frullate lo zucchero con la pasta di mandorle, fino a che non ci siano più grossi pezzi di pasta. Se avete usato un robot da cucina, aggiungete direttamente il burro e il sale e montate fino ad ottenere un composto bianco e morbido, nel frullatore invece non funziona. Se avete una planetaria invece,  usate la foglia dall’inizio alla fine del procedimento. Aggiungete le uova poco alla volta continuando a montare. Ora aggiungete i restanti ingredienti e mescolate fino a che siano ben incorporati. Fate attenzione a non mescolare più del necessario. Aggiungete per ultimo il latte.

Versate un poco di impasto sul fondo dello stampo, circa due centimetri. Aggiungete le pere, io le ho messe dritte in fila, ma potete anche scegliere un’altra posizione. Poi con l’aiuto di un sac à poche aggiungere il restante impasto intorno alle pere. Se volete potete farlo anche con un cucchiaio, facendo attenzione a riempire per bene tutto lo stampo!

Cospargete di mandorle filettate e infornate per circa un’ora e mezza, facendo comunque la prova stecchino prima di sfornare. Se il dolce dovesse prendere troppo colore in forno, abbassate la temperatura a 160. Abbiate cura di fare la prova stecchino lontano dalle pere, che rilasceranno molto succo! 😉

Lasciate raffreddare completamente prima di sformare, e se doveste avere problemi immergete il fondo dello stampo in acqua calda per pochi minuti, sarà più facile staccare il dolce.

Provate a tagliarlo e vedrete….che le pere sono ripiene di torta! Bello, no?! 😀torta con pere intere

torta con pere intere

Buona merenda e buon autunnoinverno!

Happy kanelsbullensdag 2014!

[scorrete in basso per la versione in italiano]

Today is cinnamon roll day here in Sweden!

I made mini rolls using this recipe, and adding some almond past in the filling, for a twist! 🙂

Happy kanlesbullensdag and happy baking!

Cinnamon rolls

Oggi in Svezia è il giorno delle girelle alla cannella!

Per festeggiare ho preparato delle mini girelle, usando questa ricetta ed aggiungendo della pasta di mandorle al ripieno! 🙂

Buon kanelsbullensdag e buon divertimento! 🙂

Madame La Fluffosissima: The true and eventful story of a last minute cake.

[scorrete in basso per versione in italiano]

This is the story of a last minute cake.

One that you improvise when you find out that you have been invited to the birthday party of a foodie-wine expert-lover of all things beautiful- friend.

I mean seriously what to do, for a person like him? Cookies? Not good! Loaf cake? Nope. Mousse? Chocolates? No time.

Then I think about the cake that my friends Bloggalline do, so often that it practically became our manifesto. They are foodies! They have great taste! They know all things pretty! Let’s do it! 🙂

I have to admit that I had to rush A LOT. So the pictures were the least of my problems. And yes, you can totally see it.

I had to make something out of what I had at home, including for the decoration…so let’s face it, it is not the best looking cake ever, but it is the proof that last minute cakes are possible!

This is an incredibly versatile cake base, and thousands of different versions are possible.The only limit is the lack of imagination, so get creative and hands on! 🙂

fluffosa al tè


OOLONG TEA AND LEMON FLUFFOSISSIMA (makes a 21 cm cake):

  • 200 gr. sugar
  • 190 gr. all purpose or weak flour
  • 5 eggs
  • 130 gr. sparkling water
  • 80 gr. sun flower or light flavoured oil
  • 1 teaspoon baking powder
  • 2 drops of lemon juice
  • a pinch of salt
  • the zests of 1 lemon, finely grated

FOR THE GLAZE:

  • 250 gr. icing sugar
  • 2 tablespoons of oolong tea leaves
  • a drop of water

How is it done?

Super simple: First, set the oven to 165 °C.

Separate the eggs and whip the whites with a couple of drops of lemon juice,  until almost firm.

Sift the flour with the baking powder in a bowl, then add all the rest of the dry ingredients. Make a well in the center and pour without stirring the following ingredients, in this order: oil,  egg yolks, water, lemon zest. Now with a whisk, stir until smooth.

Pour 1/4 of the egg whites in the cake mix and stir with the whisk to lighten the batter. Now put the whisk away. Pour the rest of the whites in and mix with a rubber spatula,and start folding in. Across the bottom of the bowl, scraping the side towards you and folding it on the top. Slowly rotating the bowl and continuing the folding movement you won’t break the nice air bubbles that you create while whipping the whites.

Pour in an aluminium cake tin, like the chiffon cake ones, without paper, butter or flour. Note that depending on the shape of your tin, you might have a little batter left over. Make sure you don’t over fill the cake tin as the cake will puff a little. 3/4 of the tin works great. Bake at 165 °C for 40 minutes and then 175°C for 10 minutes.

At this point insert a skewer in the middle to make sure the cake is cooked. It should come out clean and dry. Now take the cake with a kitchen cloth or gloves and turn it upside down, using for example 3 glasses to work as a base and leave it cool down like this (this is why it is absolutely essential that you don’t use a non stick pan, and that you don’t put any paper or butter in it. If you did, most likely by now you are getting organized to eat the cake from your kitchen table).

Now prepare the icing: In a blender, combine icing sugar and tea. Mix until you don’t spot any big pieces of tea leaves. It’s white. Nothing happened. This recipe is wrong!

Now pour it in a bowl. Add a couple of table spoons of water and stir. Its turning black. Magic! The recipe works! 🙂

Keep adding water little by little until you get a thick cream consistency.

When your cake is cold, scrape the sides of the tin with a spatula or knife, place the cake where you want to serve it and pour over the glaze.

So this was the story of a last minute cake. And they lived happily ever after.

Torta fluffosissima al tè

THE END.

Ps: if you are curious to read more about the mum of this great cake, take a look here:

http://www.dolcigusti.com/2012/10/torta-sofficissima-con-lacqua.html

Questa è la storia di una torta del ultimo minuto.

Una di quelle che devi improvvisare quando scopri di essere stata invitata ad una festa di un amico foodie – esperto di vini – amante delle cose belle.

Seriamente, cosa preparare per una persona così? Biscotti? Non indicati! Plum cake? Direi di no! Mousse? Cioccolatini? Non c’è tempo!

Poi mi viene in mente la torta più quotata fra le mie amiche Bloggalline. Loro la fanno così spesso che ormai è una specie di manifesto del gruppo! Loro sono foddies! E hanno gusti raffinati! E ne sanno qualcosa di cose belle! E’ quindi deciso, che fluffosa sia! 🙂

Devo ammettere che sono andata veramente di fretta, per cui le foto sono state davvero l’ultimo dei pensieri. E in effetti si vede!

Ho dovuto adattarmi ad usare quello che avevo in casa, anche per la decorazione, quindi diciamocelo, questa non è la torta più bella del mondo, ma è la prova che si puo’ fare una torta all’ultimo secondo!

Questa è una base incredibilmente versatile, e l’unico limite è la mancanza di immaginazione, per cui sfoderate la creatività e forza, mani in pasta! 🙂

fluffosa al tè


FLUFFOSA AL TE’ OOLONG E LIMONE (per una torta da 21 cm.)

  • 200 gr. zucchero
  • 190 gr. farina 00 o farina debole
  • 5 uova
  • 130 gr. acqua frizzante
  • 80 gr. olio di semi
  • 1 bustina di lievito per dolci
  • qualche goccia di succo di limone
  • 1 pizzico di sale
  • la scorza grattugiata di 1 limone

PROCEDIMENTO:

Facilissimo: iniziate con l’impostare il forno a 165°C.

Separate le uova e montate gli albumi a neve non ferma, con qualche goccia di succo di limone.

In una ciotola capiente setacciate la farina e il lievito. Aggiungete tutti gli altri ingredienti secchi. Poi fate una fontana al centro e versatevi, senza mescolare nell’ordine: olio, tuorli, acqua, zeste di limone. Mescolate con una frusta. Aggiungete al composto un terzo degli albumi e mescolate con decisione per alleggerire la consistenza. Ora mettete da parte la frusta e prendete una spatola di gomma (leccapentole o marisa, per gli amici). Incorporate il resto degli albumi all’impasto mescolando delicatamente on movimenti dal basso verso l’alto, ruotando la ciotola.  Versate in uno stampo non antiaderente e assolutamente non imburrato né foderato di carta. In relazione alla forma dello stampo che utilizzerete, forse vi avanzerà un po’ di impasto, in ogni caso riempite lo stampo circa per tre quarti.

Infornate a 165°C per 40 minuti e poi a 175°C per 10 minuti.

Fate la prova stecchino e se la torta è cotta capovolgetela e lasciatela raffreddare a testa in giù, poggiandola magari su dei bicchieri. Ecco perchè è fondamentale che la torta resti attaccata allo stampo, altrimenti arrivati a questo punto dovrete cominciare ad organizzarvi per mangiarla direttamente dal tavolo della cucina!

Adesso preparate la glassa: in un frullatore unite lo zucchero a velo e le foglie di te e frullate. Non succede niente, è tutto bianco, questa ricetta non funziona!!

Ora versate lo zucchero in una ciotola, aggiungete l’acqua poco a poco fino ad ottenere una consistenza cremosa e…magia! La glassa diventa nera, questa ricetta funziona! 🙂

Una volta raffreddata la torta, passate una spatola o un coltello intorno ai bordi, sistemate la torta sul piatto da portata e versatevi la glassa.

Questa è la storia della torta del ultimo minuto. E vissero tutti felici e contenti.

Fluffosa al tè


FINE.

Ps: se volete scoprire di più sulla mamma di questa torta fantastica, ovvero Monica di Dolci Gusti, cliccate qui:

http://www.dolcigusti.com/2012/10/torta-sofficissima-con-lacqua.html